Omega Owners Forum

Please login or register.

Login with username, password and session length
Advanced search  

News:

Search the maintenance guides for answers to 99.999% of Omega questions

Show Posts

This section allows you to view all posts made by this member. Note that you can only see posts made in areas you currently have access to.

Messages - Valentin

Pages: [1] 2 3 4
1
Omega General Help / Re: elite rear shelf speakers
« on: Today at 10:03:44 »
You mean you found the wires pre installed near the shelf ?

2
Omega General Help / Re: WIM
« on: 11 February 2026, 09:23:59 »
Ok understood.

For the values coherence, I took example on existing documents. If anybody find an error please tell me and I will apply correction.

Reminder of the WIM values found here https://www.omegaowners.com/forum/index.php?topic=119981.msg1524628#msg1524628
If anybody has them somewhere on his computer please can you compare and confirm they are the same ? Because I only rely on this link and still not sure if we focus on the right values.

Rear camber  -2º 05' +/- 0º 40' Cross 0º 00' +/-0º 04
Rear toe   0º 00' +/- 0º 45' Total 0º 20'  +/- 0º 10'

Front camber -1º 10'  +/- 0º 45' Cross 0º 00' +/- 1º 00'
Front caster  5º 40' +/- 1º 00 cross 0º 00' +/- 1º 00''
Track Diff angle -2º 00'  +/- 0º 45'
Front Toe 0º 05' +/- 0º 05' total 0º 10' +/- 0º 10'


3
Omega General Help / Re: WIM
« on: 10 February 2026, 19:40:38 »
Hi guys, I took the time to illustrate the WIM settings on a standard diagram, applying the values found earlier on this topic. This can be helpful when you visit your favorite wheel alignment center :y

Everything seems okay except the rear total toe. The separate values are 0°00' +/- 0°45' right? How the total can be 0°20' +/-0°10' ?


4
Omega General Help / Re: WIM
« on: 03 February 2026, 18:28:36 »
Hi guys, I'm looking for the correct settings too and I found this topic December 2013

https://www.omegaowners.com/forum/index.php?topic=119981.msg1524628#msg1524628

It sais

just found my last printout.. Target values are ...

Rear camber  -2º 05' +/- 0º 40' Cross 0º 00' +/-0º 04
Rear toe   0º 00' +/- 0º 45' Total 0º 20'  +/- 0º 10'

Front camber -1º 10'  +/- 0º 45' Cross 0º 00' +/- 1º 00'
Front caster  5º 40' +/- 1º 00 cross 0º 00' +/- 1º 00''
Track Diff angle -2º 00'  +/- 0º 45'
Front Toe 0º 05' +/- 0º 05' total 0º 10' +/- 0º 10'

Because I bought the car with alignment made 3 months before based on GM values I guess, here are the front tyres after 16000kms :D


I will replace wishbones, drop links and rear track rods - fOr SuRe as our baguette président sais - then have to find a decent automotive geometry center.
But, are these values okay? Front camber -1º 10' seems a lot ???

5
Omega General Help / Re: cant unlock drivers door
« on: 03 February 2026, 14:20:11 »
I got the same issue sometimes, even once we were two, driving with the elbow out of the window and I accidentally moved the pin down. When I moved it back up, all pins were up but the passenger door was impossible to open from inside or outside.

I opened the rear door and while closing and opening with the key fob in my right hand, I shaken the front pin with my left hand with hope it could unlock some sort of electro-mechanical things inside. Which eventually worked !

But then yeah, you need to investigate further.

On my side, I don't lock the car anymore, there is no need anyway where I live ;D

6
Omega General Help / Re: Thermostat transfir pipe
« on: 13 January 2026, 09:47:09 »
You can find stainless steel pipes here https://acsparts.biz/en/cooling-pipe-90411629-opel-ss/
Never used this ACS part but I'm sure it's the same quality level as their oil cooler :y

4 things to know, as it happened when I changed mine this summer :
- The new thermostat housing can have higher cast's dimensions where you put the bolts. I grinded the aluminum of the housing to reuse original bolts.
- The original pipe was very very difficult to remove, even if it was free from any bolt, still impossible to extract. I used a heatgun to locally heat the pipe where it's inside the thermostat housing, in order to dissolve the crap around the o-rings, and it finally worked, without breaking anything.
- Can be useful to remove the 3 electrical plugs aside the ECU box, to clear the space and access.
- New o-rings ordered separately felt very thin and I was not confident with them. I put some Loctite 5923 inside the housing (because if you put directly on the pipe you need too much dexterity to avoid choping the loctite when passing through the tunnel).

I don't know if I'm clear because I feel that I can use more precise vocabulary, which, as a French baguette, I don't have  :D

7
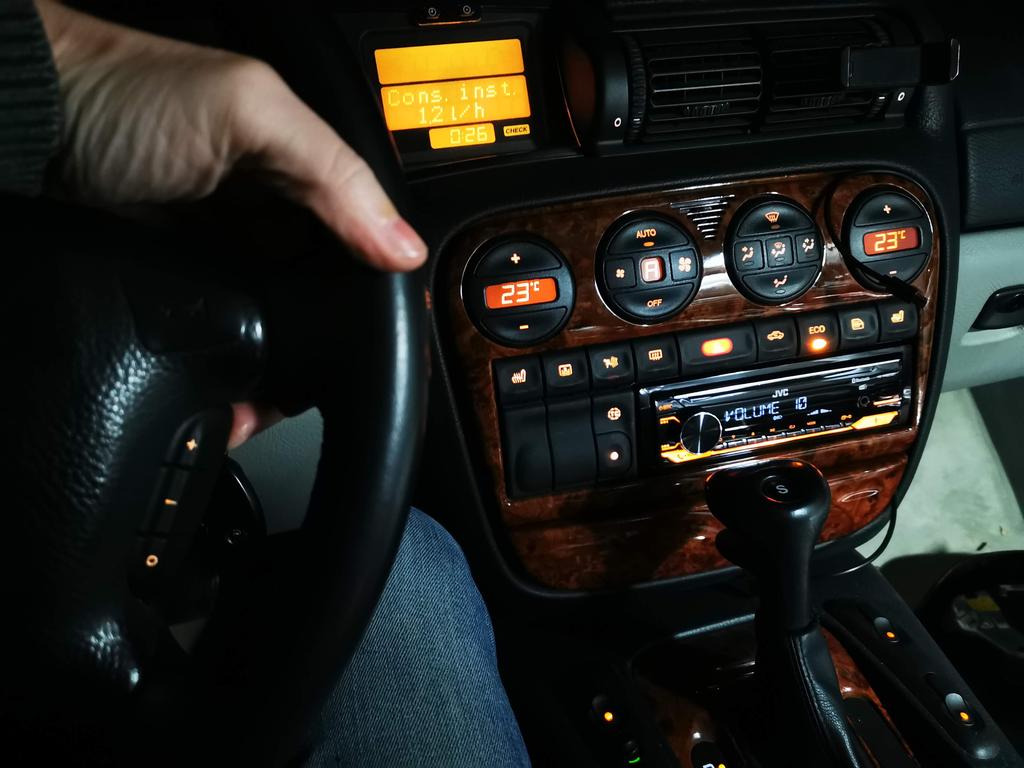
Steering wheel remote control installed with success 8)

All the information above are right, that 96 MV6 was pre-wired for the SWC and it's never been modified by the previous owner. The wire that serves as remote wire for the 6 buttons was connected to the "anti-theft gnd" at the back of the original Philips SC804 radio, but was connected to nothing at the back of the wheel, because of the 4 wires SRS ring.

Here is what is needed :

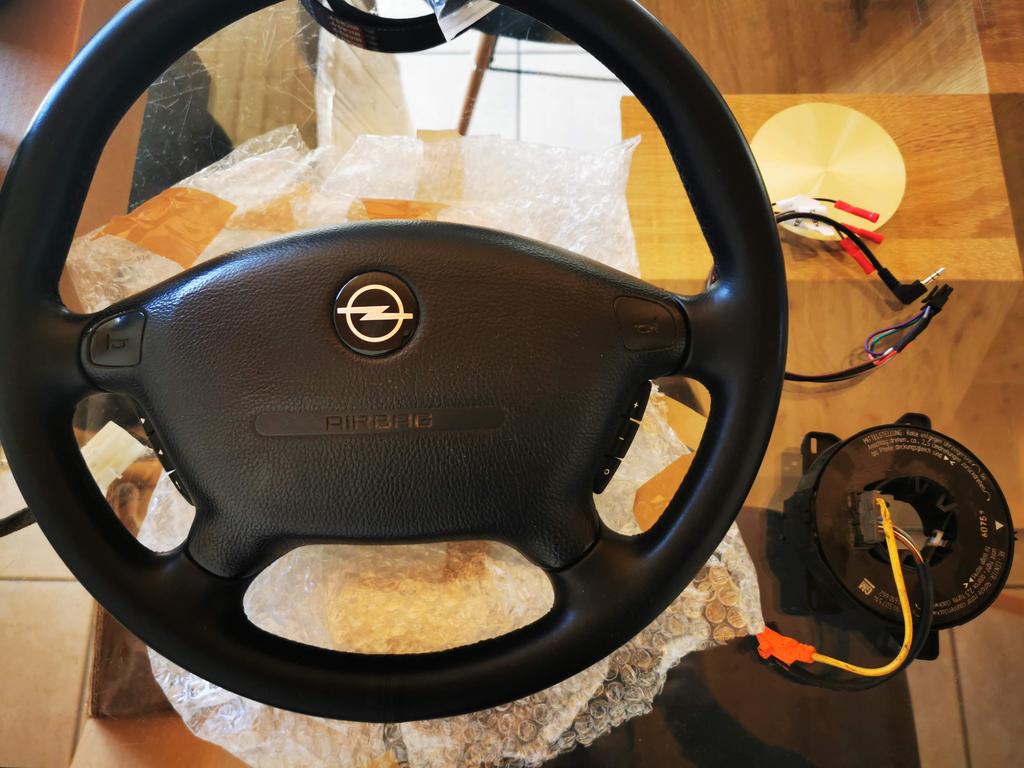
- Find a 98 steering wheel
- Find a 6 wires SRS ring (the one I found is from a Vectra B)
- Buy a Connects2 CTSOP001.2 even if it's not mentioned for Omega before 98
- Buy a patch lead Ctmultilead.2


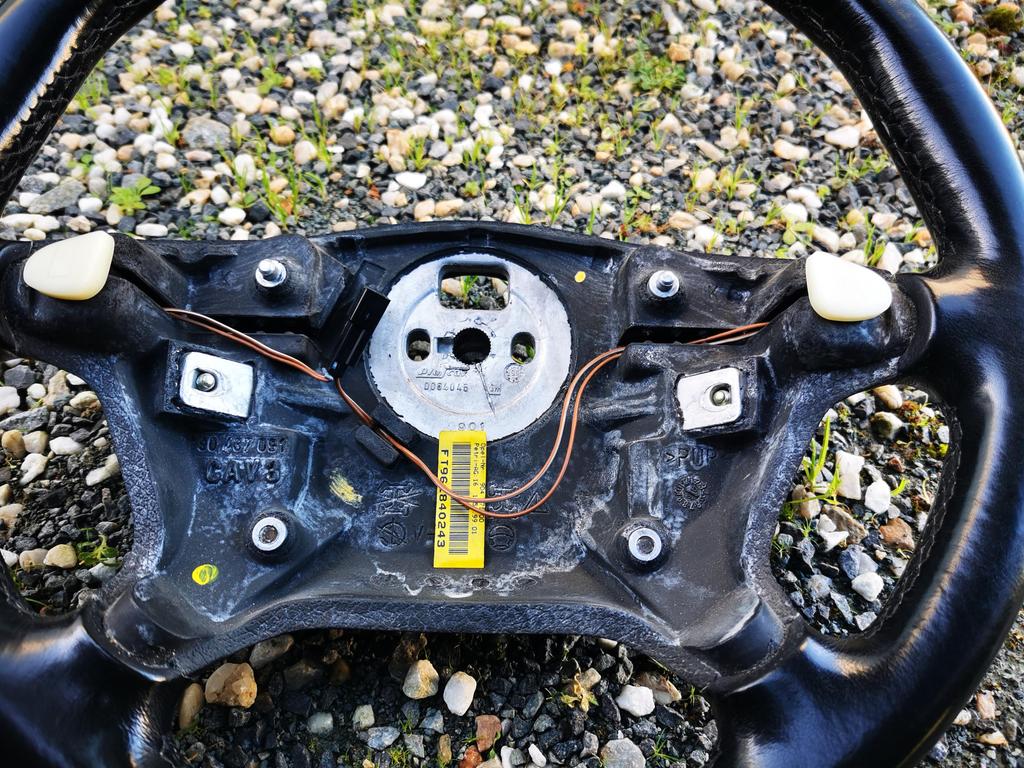
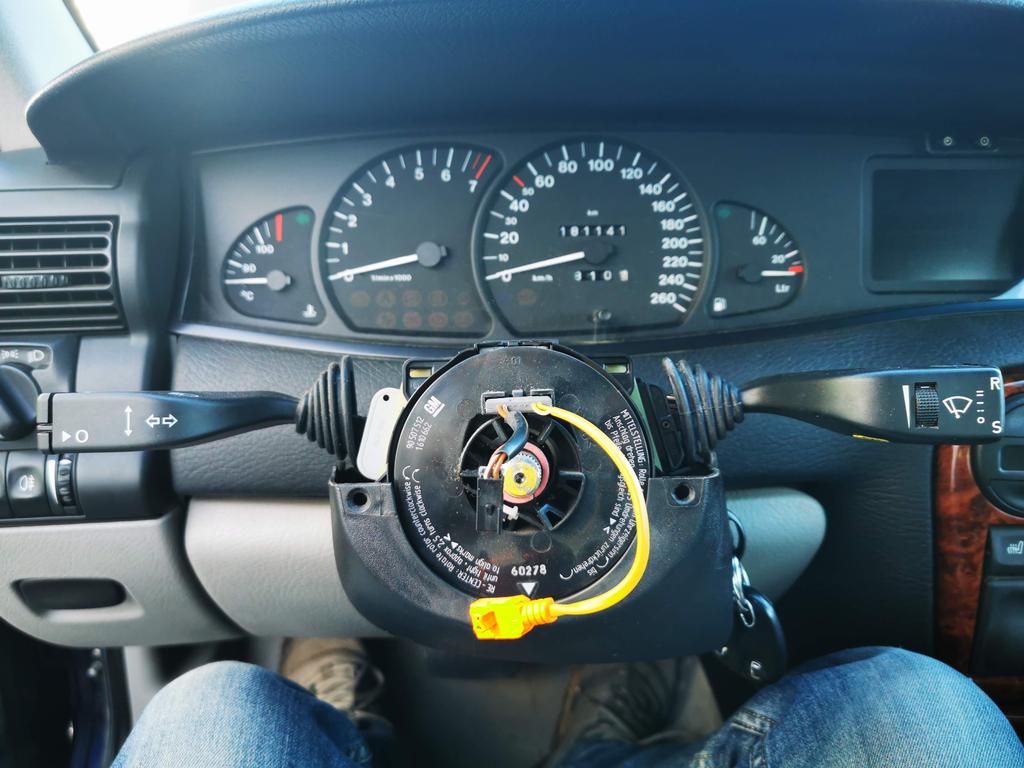
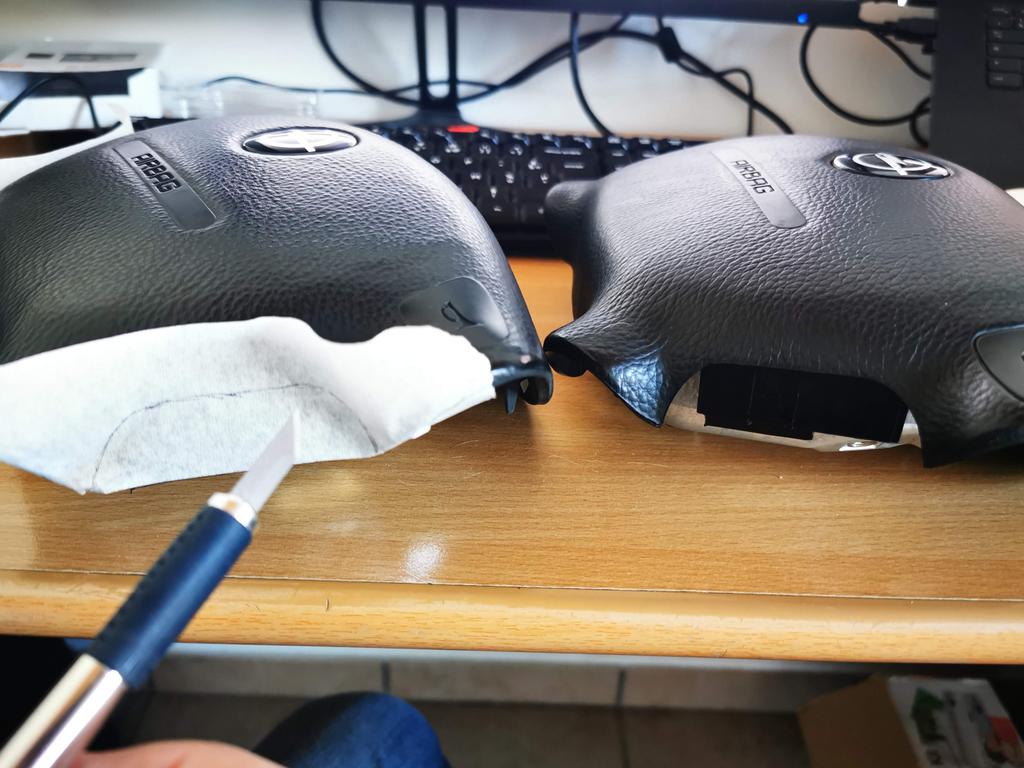
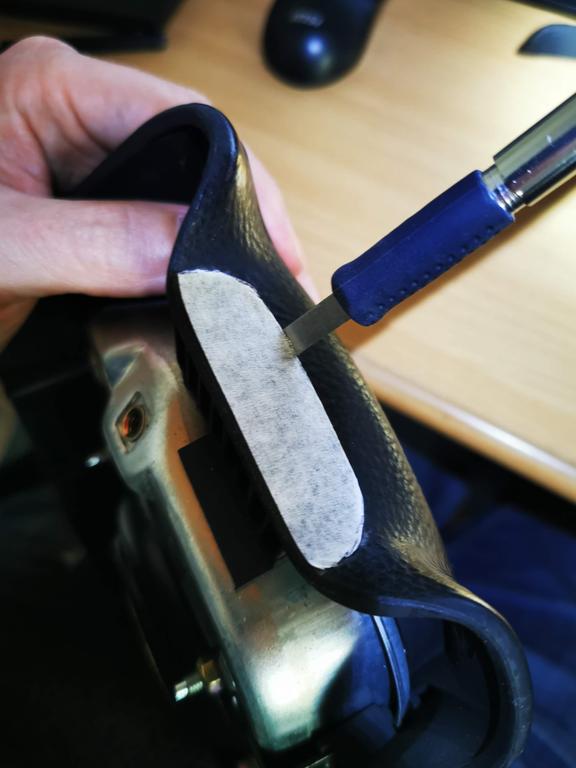
Then you need to remove the steering wheel, replace the SRS ring with the 6 wires one. I found out the airbag from the 98 model had a different connector. I ordered a SRS ring which fit my original airbag, I modified the PUR material of the airbag cover to fit the buttons, and I put back the original airbag, being sure the connection (orange connector) and any electrical specification could stay the same as before.

Then cut or disconnect the colored wires you don't need on the patch lead, for JVC you keep the orange one as described in the technical note. Next, you need to connect the SWC from the aftermarket radio to the "key1" of the patch lead, connect the GND from the patch lead to any of the gnd behind the radio. This is the only cut I had to make (I cut the small gnd of the Connects2 loom to avoid cutting the car loom).

Put back in place the airbag (needed a lot of rework with the Dremel and scalpel), connect the ISO connector to the car, and enjoy.

I will maybe upgrade this installation to something programmable in the future, because the 6th button on the left hand side does nothing, as said on the technical note delivered with the Connects2 device.


Hope it will help anybody who wants to retrofit this feature, I'm sure it's quite easy even when the car is not pre-wired :y

Next operation : bi-led lenses retrofit headlights 8)

8
Omega General Help / Re: Oil in radiator header tank.
« on: 04 November 2025, 10:01:02 »
There is a solution like I said before, the part made by ACS in Ukraine is perfect. It's a bit expensive but looking at the amount of work it needs to be replaced, better to go for this aftermarket solution IMO. AND it comes with the 2 O-rings that you found flattened. They actually are O-rings and made in NBR, same material as any o-ring made for automotive industry  :y

https://acsparts.biz/en/maslookholodzhuvach-90412391-opel-saab.-nerzhaviiucha-stal/

https://www.omegaowners.com/forum/index.php?topic=151703.msg2058124#msg2058124

As for the dowty washers for the coolant bridge banjos, again, take the old one and a banjo bolt with you and go to a truck repair shop. They can find a model that is close to yours. Never reuse the old ones.
For the all metallic washers on the oil banjos, same you can ask the truck shop. In my case they gave me 4 new ones but arrived at home I found out one of them was a bit smaller and didn't fit. I reused an old one after a good clean and 400 sandpaper. It works fine.

Grey OEM Vauxhall/Opel sealant or ELRING DIRKO 70ml GREY Gasket Sealant for the plate.

Finally, to have peace of mind about any leaks, I put a very thin layer of Loctite 5923 on each face of the 8 washers and on both contact faces of the 2 O-rings. Don't put too much on those for the coolant bridge, because they need to make electrical contact for the temp sensor's ground. No RTV, only suitable Loctite 5923 which is a permanent sticky/soft mixture that never falls and never tears apart.

Take care of the peripheral components (wiring looms, tubes, connectors) and everything should be fine :y 8)

9
Omega General Help / Re: Belt Kit & Antifreeze question.
« on: 21 October 2025, 16:52:06 »
Aaaah la Chouffe elle fait mal aux cheveux  >:D

Sorry I had to ;D

10
Omega Electrical and Audio Help / Re: Omega B1 "best" headunit?
« on: 20 October 2025, 09:10:58 »
Regardless the head unit, if you have the CD Changer you can unpin the R-L-Gnd from it and pin a 3.5 jack instead. You need to keep one CD in the changer for it to run and allow the R-L lines to stay activated.

Works fine and you have the best sound quality that is possible to get. Cassette adapter is really poor quality.

I personally plugged the jack to a bluetooth receiver so there is no wire running through the dashboard :y

Then, if you plan to install the Bose amp, you will need to find or recreate the wire harness, change all the speakers to 2ohms from Bose, and find the specific head unit to work with. And - imho - you will loose trunk space because of the amp tray.

11
Omega General Help / Re: Nonstarter
« on: 08 October 2025, 12:32:20 »
If you are sure there is no fuel coming out of the injectors, then it looks like there is something wrong with the injector's loom. Forgot to replug the connector near the coil at the back of the engine ?

12
Omega General Help / Re: Oil in radiator header tank.
« on: 30 September 2025, 09:40:23 »
The one removed from my 96 is aluminium :y

13
Omega General Help / Re: Oil in radiator header tank.
« on: 30 September 2025, 08:57:26 »
Of course, but Graham's Omega is a later one, assumed with a stainless steel one, and if it's broken it means any other later one can do the same because the part has maybe some weakness from its thin design.

Regarding the amount of work to change it, better to change it by a model made with a strong thick tube, and don't come back to it in 5 years :y

14
Omega General Help / Re: Oil in radiator header tank.
« on: 29 September 2025, 17:20:54 »
The original one is flat


If you look on the 3rd picture on ACS website, the shape is a bit square for the cooler to fit correctly in the block :y

You can take a look at my topic here https://www.omegaowners.com/forum/index.php?topic=151703.msg2058124#msg2058124 but it seems the pictures are gone :-\ ;(

15
Omega General Help / Re: Oil in radiator header tank.
« on: 29 September 2025, 16:40:17 »
Hi mate,

I don't really know about the troubleshooting of this particular case. But I can give you some info about the oil cooler.

I replaced mine (preventive move) by a stainless steel one from ACS (Advanced Cooling System), which is Ukrainian supplier for a lot of Opel/Vauxhall parts.
https://acsparts.biz/en/maslookholodzhuvach-90412391-opel-saab.-nerzhaviiucha-stal/

The part is 113€, costs near 150€ after all customs and taxes.

It comes with both new o-rings. Then you need 4 new bi-material rings and 4 new metal rings for the 4 banjo bolts of the cooler itself and the cooling bridge.

My genuine one is still like new but it's the aluminum one, so I don't want to propose it to you :D it could fail at anytime

Pages: [1] 2 3 4

Page created in 0.028 seconds with 18 queries.